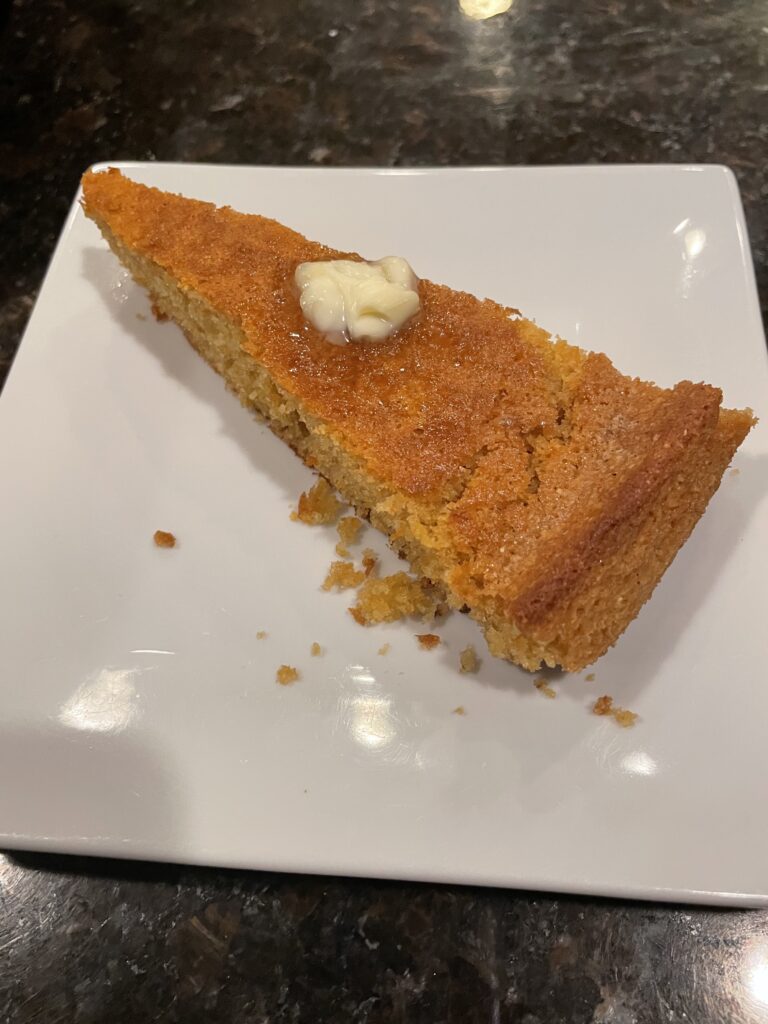
Cornbread or Pan de Choclo is a dish I make often in our household. It goes well with any meal but specially well next to a great soup. So here is the recipe to accompany a hearty Potato Soup. This corn bread is specially crispy and golden brown. It is not too sweet so it could be eaten as a side dish with a nice meal or as a treat. Corn Bread is loved in the American culture and corn likewise is an ingredient used in many LatinAmerican dishes.
Corn bread made on a cast iron and being cooled off
Ingredients
1/2 cup unsalted butter, melted and slightly cooled
1 cup all-purpose flour
1 cup yellow cornmeal
1/4 cup brown sugar
1 teaspoon baking powder (optional: makes a fluffier cornbread)
1/2 teaspoon baking soda
1/4 teaspoon salt
1 cup buttermilk
1/4 cup honey
2 eggs
Preparation
Preheat the oven to 200C | 400F and place a rack in the middle. Lightly grease a 9-inch cast iron skillet or 9-inch square baking dish with butter and place the skillet/dish in the oven to heat.
Alternatively for cast iron skillets: Heat 1/2 cup unmelted butter in your cast iron on the stove over medium heat until melted. Turn off the heat and let the butter cool slightly before adding it to the batter. (This second method is the one I use because the texture is a little crunchy and more golden).
In a large bowl, whisk together the flour, cornmeal, sugar, baking powder, baking soda, and salt.
Then make a well in the center and add the buttermilk, honey and eggs. After, mix well to combine, then add the slightly cooled melted butter. Once more mix again until ‘just’ combined (do not overmix).
Carefully remove your ‘hot’ pan or plate from the oven with oven mitts and pour the batter into the hot pan or plate right away.
Bake until cornbread begins to brown on top and a toothpick inserted into the center comes out clean (about 20-25 minutes). Let cool for about 10 minutes before cutting and serving.
Ingredients and an expectatorStep 1 – Turn oven on at 400 FStep 2 – Heat up the cast ironStep 3 – mixing sugar and cornmealStep 4 – Add flour, baking powder and other ingredientsStep 5 – Mix wellStep 6 – Once it is all combined take the cast iron out of ovenStep 7 -Get cast iron readyStep 8 – Pour the batter in the hot cast ironStep 9 – Bake – Cornbread is ready
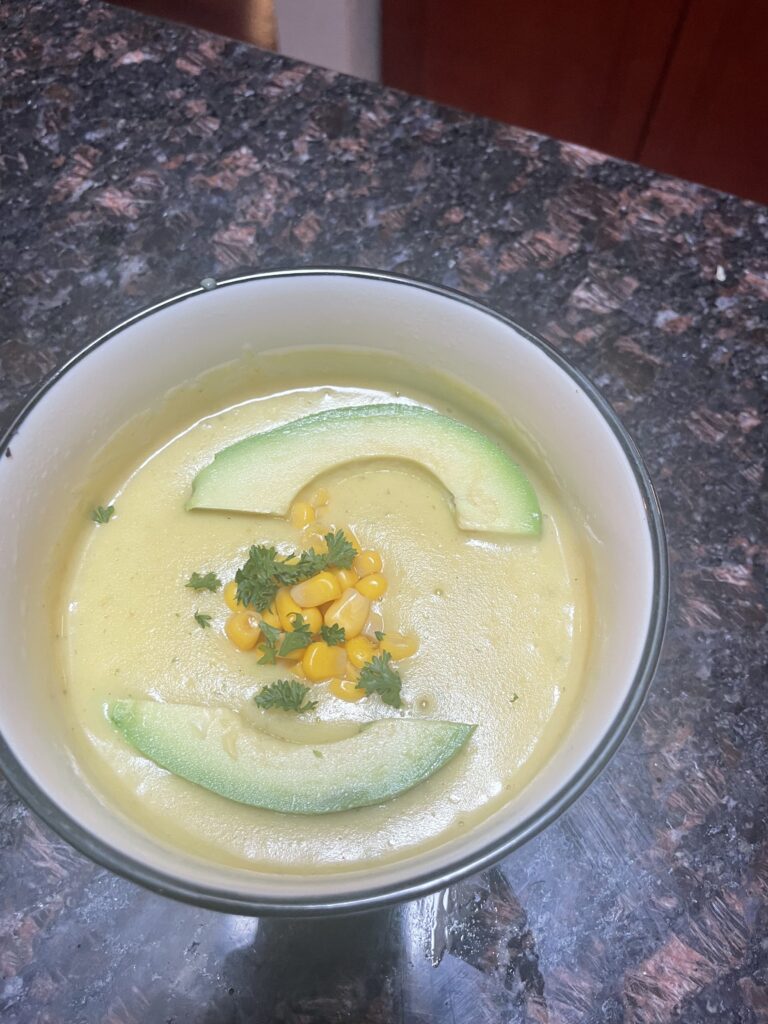
Potato Soup or Locro de Papa is a hearty and comforting soup from Ecuador. It is made with simple ingredients and spices yet very delicious. Although it is a soup, the name Locro – “rugru” in Quechua (Andean native language) means stew. This potato soup is a great dish for children, tasty and nutritious. The vegetarian recipe uses originally cow’s milk instead of coconut milk. Cheese (1/4 cup) is added to the soup and as a garnish. However, I have made this adaptation to be lactose free. It serves 4 portions. I made it for Cultures day and it used to be a staple in the lunch menu at Guanacaste Waldorf Inspired School in Costa Rica. Please send us a message if you have any questions.
Ingredients
3 large Russel potatoes or 6 medium yellow potatoes
1 tablespoon of vegetable oil or olive oil
1 white onion
2 green onions
4 cloves of garlic
1/4 cup of chopped cilantro
2 teaspoons of cumin
1 teaspoon of turmeric
1.5 teaspoon of paprika
1 teaspoon of salt
1 teaspoon of pepper
16 oz. vegetable stock or water with a vegetable bullion cube
1 cup of coconut milk
cooked corn kernels, parsley and avocado to garnish
Preparation
Chop the onions and the garlic.
Stir-fry in a pot the diced onions and garlic with the vegetable oil until onions are translucent, about 2 minutes.
Prepare a “refrito” or sauce with the refried onion mixture and all the spices: cilantro, cumin, turmeric, paprika, salt and pepper.
Cook for 2 minutes on medium heat and add the potatoes cut in cubes.
Mix this for about 2 more minutes and add the vegetable stock or water with bouillon.
Cook for about 20 minutes or until the potatoes are soft.
With a potato masher, mash about three quarters of the potatoes in the pot.
Alternatively you may blend it in parts to the desired creamy consistency.
Add the coconut milk and cook for 5 minutes.
Add salt and pepper to taste.
Let it cool a little before serving and add corn kernels, cilantro and avocado slices to garnish.
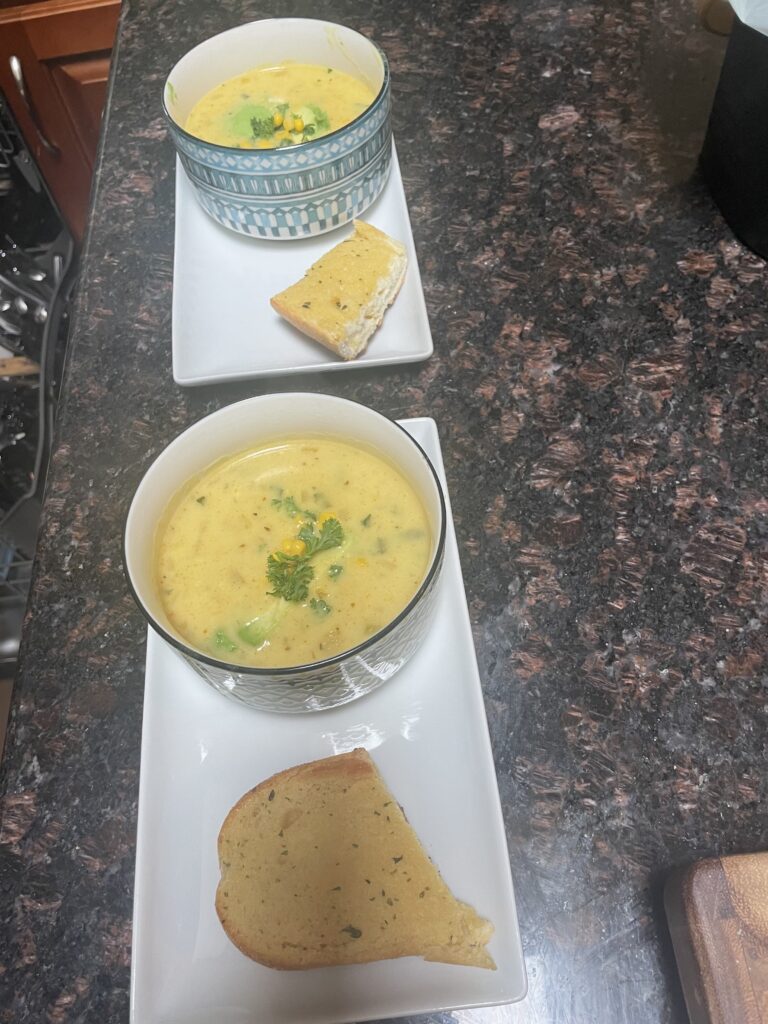
Soup is great accompanied with warm garlic bread or a slice of corn bread.
Fry the onion, garlicCreate a sauce with spicesAdd potatoes and broth or waterCook for 20 minutes and mashAdd the coconut milkCook for another 5 minutesAdd salt and pepperGarnish with corn, parsley and avocadoServe with bread
Soup and Bread go well together just about anytime of the year. I grew up in a very hot climate. However, for lunch we pretty much had soup and bread daily as an appetizer for lunch. I remember the amazing aroma and the delicious flavors of the dozens of types of soup our grandma, Hilda, and nanny, Sabina, made at home. During my childhood, my single mom although a wonderful mom, worked a regular schedule so she was not home during the day. In spite of that, my siblings and I were blessed to have grandma at home, in the first part of our childhood. And also our nanny, Sabina, was with us during all our childhood and adolescence. This was great help for my mom raising four young children and of course with generally a couple of pets to take care of too.
Summer Lessons
Both, grandma Hilda and Sabina, were amazing cooks so I learned some culinary tips at an early age. Sabina had a special influence in this skill early in my life. She lived in our house for a long time during our childhood. Therefore, she also had the task to cook as she was a fantastic cook. She had not learned to read but she was very smart and talented.
In the Summer time, my siblings and I had cooking lessons taught by Sabi, as we liked to called her. Sabi used to teach me and my siblings, from my mom’s direction, the different recipes which she knew by heart. These lessons may have been a way to keep us busy or to simply show us to be useful, I guess. In the beginning, I dreaded them but soon I learned to treasure them as Sabi had a great sense of humor. Her cheerful and sassy personality always entertained. Although she was a good teacher and a lot of fun, she would never let us goof around or get distracted. She could be very strict and have a strong sense of command.
Learning from the basics
In these summer cooking lessons, the main skill that we learned was how to make any dish completely from scratch. So if we were making a soup, that would mean that if the soup required peanut sauce, we needed to start from getting the peanuts from the shell. We would sit down on the porch of the backyard and start de-shelling the peanuts, then the next step was to toast them on the stove and then peel them. The final step was to crush them and finally mix them with milk or any required liquid for the sauce.
The process was a bit cumbersome but she made it seem so smooth and quick. I remember thinking I want to always cook like this, so naturally and with the freshest ingredients. Her food was amazing. As a Waldorf teacher and mom, growing up with this concept of making something with fine, natural ingredients and from the beginning of the process, without shortcuts, made me appreciate Waldorf Education in a special way.
Putting skill to practice
However, It was really in my adult years that I put them to practice, almost by necessity. In any case, it is a treat to have all these recipes stored in a special place in my memory. Every time I have made these recipes for or with my children or class, I go back to those sunny hot days in the kitchen in a remote place in the tropics. In fact, I just made this great soup this week (which was my favorite one growing up). It was a soup we had in the menu at Guanacaste Waldorf Inspired School in Costa Rica because it was a kids’ favorite.
So I hope you can make it with your children at home or with your class. It is a simple, vegetarian, lactose free version. I am sharing it today celebrating Cultures Day around the Americas. The soup in Spanish is “Locro de Papa” that goes well with “Pan de Choclo”, so celebrating the Ecuadorian culture and the American Culture. Locro means stew in Quechua -“ruqru”. In English it would be Potato Soup/Stew and Corn Bread. Enjoy!
Many cultures celebrate the coming winter months with a festival of light. In Christian cultures, this holiday is Advent.
Advent is the time of preparation for the celebration of the birth of Jesus at Christmas. The Advent season is revered from its beginning, the last Sunday of November, until Christmas day with four Sundays.
The festival of light is recognized by many cultures with different celebrations. The ancient Egyptians celebrated the festival of Osiris; the Celts and Druids held great festivals of light and fire; and the Jews celebrate Hanukkah, the festival of lights.
Advent Celebration
In Waldorf schools this time is lived with great intensity. There are several rituals or proceedings in the Advent celebration. Generally there are different items that are added to the classroom such as a wreath, the nature table with a blue cloth, angels and a manger.
Advent wreath
On the teacher’s table or the seasonal table, the Advent wreath with 4 candles is prepared. Every Sunday a candle is lit (at home), and at school a new one is lit every Monday. The candle will be lit every day during the first week with a poem and Christmas carols as part of the rhythm for the beginning of the day. Next Monday a second candle is lit, and then a third, until the week of Christmas where all four candles are lit. During the lighting of the Advent candles, the stories of the angels are a good way to bring the elements to the nature table.
Nature Table
The station table is changed on the first week of Advent. A blue cloth is placed on the wall and another on the table below representing a country scene. At one end of the table Mary is placed, behind Saint Joseph and the donkey, who each day advance a little towards the manger. At the opposite end, the place of the stable will be prepared, and a beautiful stone can be laid in the place that the baby will later occupy.
Angels Stories
The stories of the angels could also be told during each week. The blue angel is the story told the first week and a blue angel is also hung at the nativity scene and the children are told the story of the blue angel. The blue angel represents the mineral kingdom. In that first week only stones are placed on the nativity scene.
The following week, the red angel is hung and the story of the red angel is told; this angel represents plant kingdom. Some plants are laid on the nativity scene, such as: mosses, small bushes, leaves…
The following week, the white angel is hung and the story of the white angel is told; It represents the animal kingdom. In that week the animals will appear: sheep, ducklings, horses…
Before going on winter break, the purple angel appears and we tell the story of the purple angel. This angel represents the humans. In the nativity, the shepherds appear.
Manger
On the last day of class, Mary, Joseph and the donkey have already arrived at the portal. The child is laying in the crib. All the items added slowly during these past weeks are beautifully decorating the manger.
During this time, the teacher tells the story of the birth of Jesus. A small celebration follows singing Christmas carols, which is a ceremony that the children enjoy. And so is the lighting of the four candles in the wreath.
Advent Calendar
In the classroom there is usually an Advent calendar with little windows. It could be simple, made with cloth or with paper. Every day a child opens the little window and receives a small gift. This gift can be anything the teacher has prepared. Some examples are: a small stone or precious crystal, a dry fruit or seed, a small animal modeled in wax, a bright star to hang.
Advent Spiral
The Advent Spiral is a tradition that takes place usually in the first week of Advent. Preferably it is prepared and then removed without the children seeing it. Preferably the room would be dark to create the right scene of reverence and for the candles to light brightly.
With fir leaves or branches a large spiral is made on the ground. Many golden stars will be placed for the candles. At the end of it, in the center there will be a lighted candle on a base.
On a separate table, the candles are placed in a red apple that acts as a candlestick.
Advent songs or Christmas carols are sung while the spiral is being walked. An instrument could also be played, such as a lyre, guitar or flute.
Before going through the spiral, the teacher can tell a little story. Example:
”Christmas will soon arrive and like Mary and Joseph we are going to walk the path to light our candle. It will accompany us every night before we go to sleep.”
All the children will be seated and silent around the spiral, but separated from it, so that there is enough space to make the spiral walk.
The teacher enters first and arrives very calmly to the center and lights a candle. After the teacher places it on the first star and slowly returns. Each child will do the same.
Along the spiral, gold stars border it. Each child will bring a candle, light it and lay a lighted candle on top of a star.
This is a symbol of offering the best of ourselves in the service of others, making our light shine.
As we are in the darkest days during this time, the season of Advent invites us to turn on our inner light. It calls for us to find our silence where we can find strength and peace, and to share our light.